Synology Settings for NFS
Mar. 6, 2020I’ve been using a Synology NAS on my home network for several years. They make a great product for anyone who wants a simple NAS with lots of flexibility. I use it to pass files between systems on my network quite a bit. Here’s a quick walkthrough of settings within Synology’s DSM to enable mounting the NAS over the network.
Synology allows you to create Shared Folders each with its own settings for permissions, sharing, encryption, ect. You can think of these as separate logical volumes all on the same NAS device. I’ve got shares for backups, files, photos, Plex, and a home share for each user.
For these steps, I’m running Synology DSM version 6.2.2-24922 Update 4 on a DS216j. Most of the guides on Synology’s own site are outdated, referencing DSM 5 or earlier.
In this example, I’ll be creating a shared folder called backups, granting NFS permissions for and mounting it to my RaspberryPi.
- Create the Shared Folder
- Edit Shared Folder NFS Permissions
- Enable NFS Access through the Synology Firewall
- Mount NAS folder to the Pi
- Done
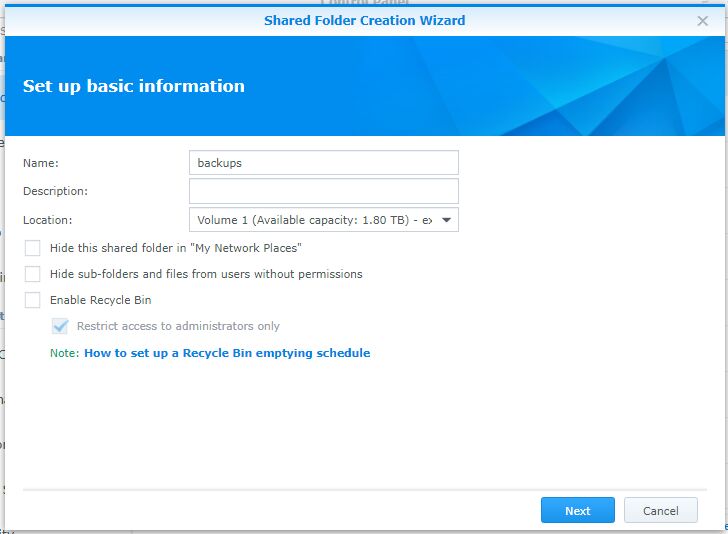
Create the Shared Folder
Navigate to the Synology DSM, open the Control Panel and select Shared Folder.
- Click Create and follow the Wizard prompts. I typically agree to the default values with the exception of disabling the Recycle Bin.
Edit Shared Folder NFS Permissions
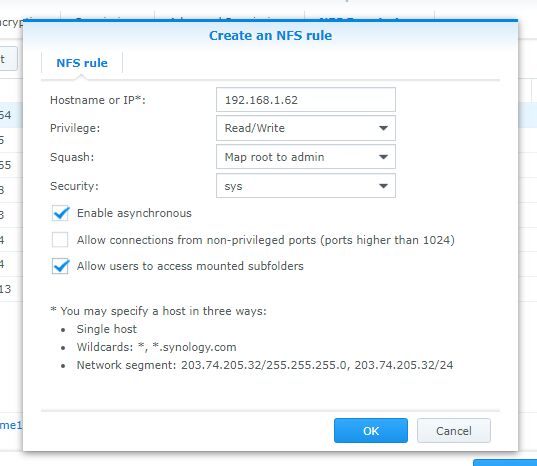
Once the folder has been created, we have to allow NFS access for the RaspberryPi to connect to the shared folder on the Synology NAS. We do this by adding an NFS rule mapped to the IP address of the Pi (192.168.1.62).
- Select the
backupsShared folder and click Edit > NFS Permissions.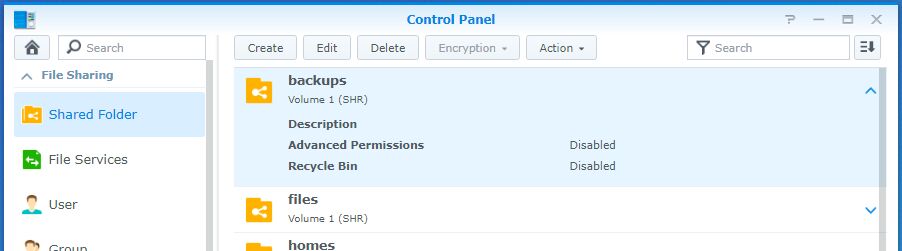 Note: Make note of the folder mount path at the bottom left of this window. We’ll need this later.
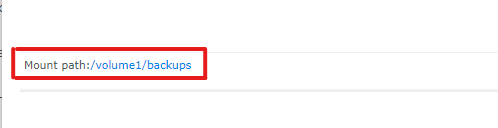
- Click Create and match these settings (changes in bold):
- Hostname or IP: Enter the local IP address (mine is
192.168.1.62)
If you want to open access to this folder from all machines on your local network, use the*wildcard instead of the specific LAN IP address. - Privilege: Read/Write (default)
- Squash: Select “Map root to admin” from the drop down menu
- Security: sys (default)
- Select Enable asynchronous (default)
- Deselect Allow connection from non-privileged… (default)
- Select the checkbox for “Allow users to access mounted subfolders”
- Hostname or IP: Enter the local IP address (mine is
- Click OK. Click OK.
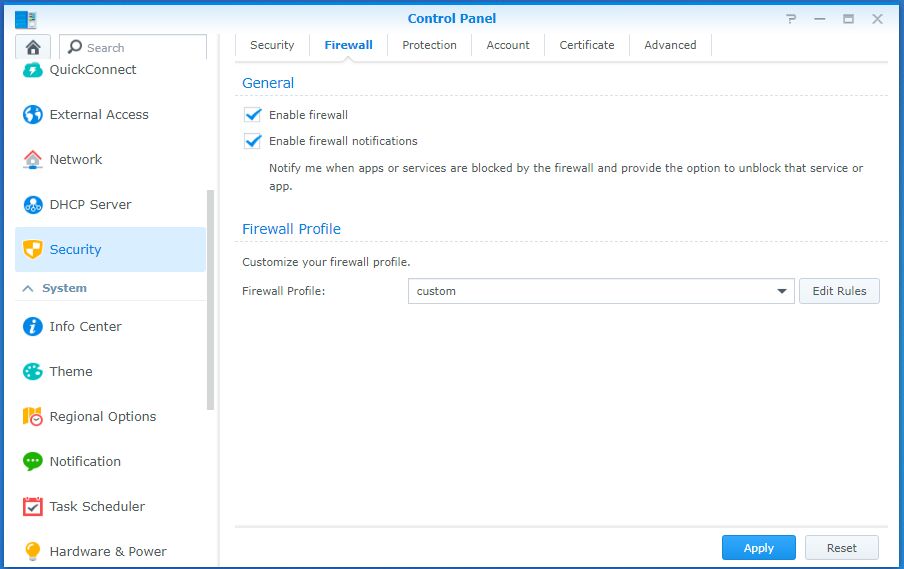
Enable NFS Access through the Synology Firewall
If you have the Synology NAS built in firewall active, you’ll need to enable rules to allow the required NFS ports. If your firewall is disabled, you can skip this step.
- Check your firewall status in the DSM Control Panel under the Security > Firewall tab.
- Click Edit Rules > Create
- Under Ports choose Select from a list of built-in applications and click Select. Find Mac/Linux file server and check the box to enable.
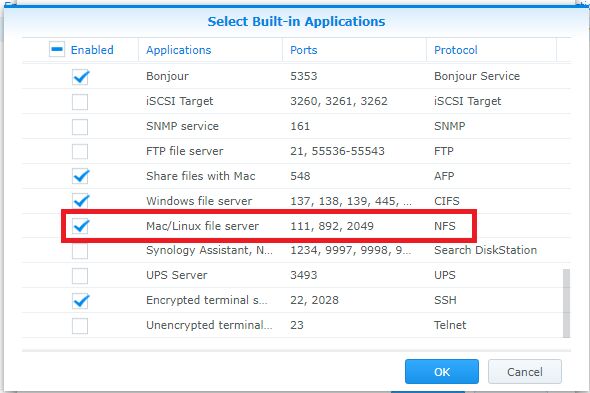
- If you plan to use this shared folder with Windows machines as well, enable the Windows file server too.
- Click OK.
- Under Action, select Allow.
- Click OK.
- Make sure the Enabled check box is checked for the created rule, and Click OK.
- Click Apply.
Mount NAS folder to the Pi
First, update the local package index and install
nfs-common.$ sudo apt update $ sudo apt install nfs-commonCreate a folder on the Pi that will be used as a mount point where we will attach the NAS. This can be anywhere on your system. Typically, mounted volumes are placed in the
/mntfolder. I’m keeping it simple here.$ sudo mkdir /mnt/backupsAttach the NAS shared folder
$ sudo mount <nas.ip.address>:[/share/mount-path] [/mnt/point]Using my values, here’s the script I executed. Replace these with your values. No response is expected from this command.
$ sudo mount 192.168.1.30:/volume1/backups /mnt/backups- Remember the mount path from earlier? -
/volume1/backups - RaspberryPi mount point -
/mnt/backups - NAS IP -
192.168.1.30. - If you get a
no such file or directoryerror, make sure you’re usingsudoand double check the IP address, NAS mount path and local mount point. - if you get a
Timed outerror, check your Synology firewall settings.
- Remember the mount path from earlier? -
Verify the mount was successful by checking the attached disks (
df) and searching for the mount point we created on the Pi (grep /mnt/backups).$ df -h | grep /mnt/backupsIf successful, it will return something like this:
192.168.1.30:/volume1/backups 5.4T 3.7T 1.8T 68% /mnt/backups
Done
Not too bad! You now have access to the shared folder to use it however you need. You can also mount other shares by creating new mount points and following the same set of instructions to enable NFS access. Using the same RaspberryPi and Synology NAS, I have /mnt/backups and /mnt/files attached for different purposes. Neat!
Let me know if you have questions or if there’s something I missed.